Using Windows Task Scheduler
If you are running DistriFile on a Windows server, you will need to use Windows Task Scheduler to periodically execute the cron.php file in order to perform automatic processing of deleting expired files, removing shares, processing of invoices (overdue notifications, recurring, etc.).
This is for manually creating a Scheduled Task! If you used our package to install NGINX and PHP, you can just use the create-scheduled-task-cron.cmd file in the /webserver/ directory to this for you!
This guide will assume that you installed NGINX and PHP by using the package we provided. Here is the NGINX / PHP package we created for Windows and DistriFile if you don't have it. You may need to update the path to the cron.php file accordingly if it is in a different location.
This guide was created with Windows 10, other versions may have slightly different looking screens.
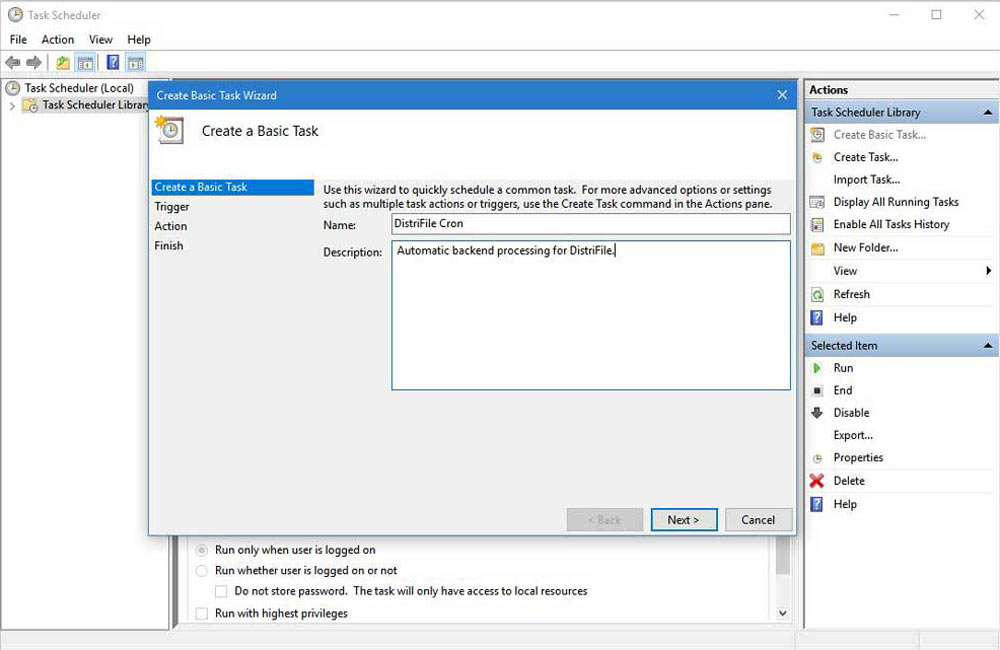
Step 1 Open Task Scheduler
- Open Control Panel > System and Maintenance > Administrative Tools > Double-click Task Scheduler.
- On the right, click "Create Basic Task..."
- Enter a name and description as shown in the image then click "Next".
Step 2 Set the Trigger
- For the Trigger, select "When the computer starts" then click "Next".

Step 3 Set the Action
- Select "Start a program" then click "Next".
Step 4 Set the Program and Arguments
- Select "Start a program" then click "Next".
- MAKE SURE THESE PATHS ARE CORRECT!
- You will receive an alert asking if you meant to add an argument. If the paths are correct, click "Yes". (We did it this way so you can see the full paths, the little field before wouldn't show the full text.)
Step 5 Click Finish then edit Properties
- Make sure you select to "Open the properties..." then click "Finish".
Step 6 Set the user to System
- Click on "General" at the top and then the "Change User or Group" button.
- Type "system" as shown then click the "Check Names" button.
- You will see that "system" is now "SYSTEM". Click "OK".
- By doing this, the task will start regardless of who logs on to the computer automatically.
Step 7 Adjust the Trigger
- Click on "Trigger" at the top and then the "Edit" button.
- Here you can change the startup options. You don't have to set a delay, but a delay of 30 seconds is good to make sure everything else loads. Set to longer if your system is slow. IF this task is for setting up a "cron" task, then set the "Repeat task every" option is set. 15 minutes is good. IF this task is to start NGINX and PHP, DO NOT Repeat this task! Clear that checkbox!
DONE!
Now click "ok" and save/close all the task scheduler screens and when you reboot, this task will start and run every 15 minutes (or whatever length you chose.)
Remember, you can manually start, stop, and restart NGIX and PHP with the 3 .cmd files created when you setup the server in your webserver directory (If you used the package we provided here.)
Contact Us
Have a question? Need more information? Send us a message.
Although this site is translated to your language, our language is English.Please enter your name!
That email address does not appear to be valid!
Please enter a message.